APN or Access Point Name is a setting which needs to be set on the mobile when we need to get connected to internet using the phone.
APN changes from one mobile service provider to the other. For example Dialog will have http://www.dialogsl.com/ Rogers will have internet.com set as their APN.
But letting users set the APN manually is always not the preferred way. Recently we developed an application for BlackBerry which the user needed to get to the internet without he manually setting the APN. The application was supposed to be delivered through BlackBerry App World so manually setting APN was not an option. In a case like this what you have to do is set the APN programmatically into the connection.
String URL = “www.SomeServer.com”;
StringBuffer bfURL;
bfURL = new StringBuffer ();
bfURL.append (URL);
bfURL.append (";deviceside=true ;apn=internet.com");
bfURL.append (";tunnelauthusername=UserName;tunnelauthpassword=Password");
String FinalURL = bfURL.toString ();
In the above code I have set the Rogers APN in to this connection.
If you need more details on the parameters used or need to know about the other parameters you are eligible to use such as WapGatewayIP, WapGatewayPort, WapGatewayAPN, etc visit the following link to view full details of the connector class.
http://www.blackberry.com/developers/docs/4.2api/javax/microedition/io/Connector.html


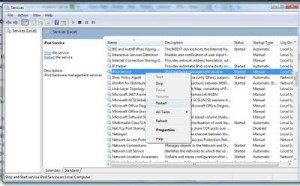


 3. Select the first radio button and press Next.
  4. Put a profile name, then click on Add to configure the SMTP account.
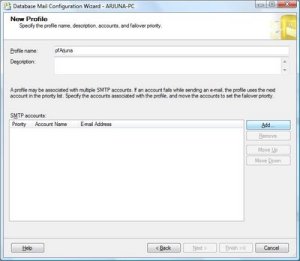 5. Click on the New Account, to create the account.
 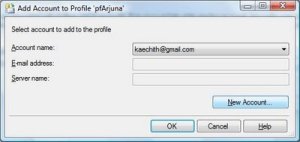 6. You need to put the account name, email address, display name, server name (smtp.gmail.com), port number (587), check the checkbox for Require secure connection (SSL) and select basic authentication as the SMTP authentication method and provide your user name and password.

 8. Using the Configure System Parameters screen you can change the parameters if required. But in this case defaults are perfect. Press Next.
  9. Press the Finish button after checking the actions to create the new profile.


