In the resent past I had to write some simple regular expressions.
So thought of sharing them with you.
An EMail Address Validator
^([a-zA-Z0-9_\-\.]+)@((\[[0-9]{1,3}\.[0-9]{1,3}\.[0-9]{1,3}\.)(([a-zA-Z0-9\-]+\.)+))([a-zA-Z]{2,4}[0-9]{1,3})(\]?)$
This will validate the entered EMail address.
A Password Validator
(?=.{6,})[a-zA-Z]+[^a-zA-Z]+[^a-zA-Z]+[a-zA-Z]+
This will validate the password to have at least 1 alphabetic character and 1 numeric digit, and altogether the password will be more than 6 characters long.
A Telephone Number Valdator
\d{4}\s\d{3}\s\d{6}
This will expect the telephone number to be in international format. For example (0094 777 123456).
A Simple Length Validator
[\s\S]{1,200}
This will allow only only 200 or lesser characters for input.
A Length Validator Which Works With Linefeed (Return, Enter)
^(.\n){0,500}$
This will validate and allow only 500 input even in a multi line field when linefeed (enter) is used in between.
A Date Validator
(0[1-9]1[012])[- /.](0[1-9][12][0-9]3[01])[- /.](1920)\d\d
This will check for the date validness. The date format should be mm/dd/yyyy to correctly validate by this.
If the date format is required as yyyy/mm/dd then use the following.
(1920)\d\d[- /.](0[1-9]1[012])[- /.](0[1-9][12][0-9]3[01])
Following are some good sites that you can refer for regular expression help.

 In the Authentication Providers screen first make sure the correct web application is selected. If not, select the correct application using the drop down in the top left corner of the page.
  After selecting the correct application click on the Default zone (Please note that here I am going to change the default zones' authentication. If you are to change in another zone simply select the required zone).
  As of the result of changing the authentication providers the Web.Config file will be changed accordingly automatically. But this is not enough we need to enter the membership provider details ther in site Web.Config file and Administrator site Web.Config files.

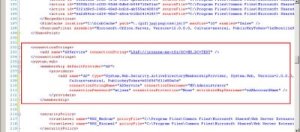 SharePoint Administration Site Web.Config

 As the final step you have to change the site collection administrators. For this click on Site Collection Administrators under SharePoint Site Management in Application Management.
  After verifying the selected application enter Primary Site Collection Administrator as AD:Administrator. If you want you can fill in Secondary Site Collection Administrator as well. After finishing click Ok.
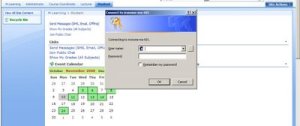
 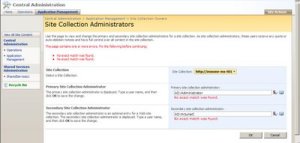 Now go back to the site and try to login, you will see that the traditional windows login page is replaced with a simple login web page. Since this login page is too simple I did some improvements to the login page and created my own one as you can see below.

