Recently I needed to change the authentication of one of the application that I did using SharePoint to forms. I needed to authenticate users using Active Directory (AD). Even there are many sources explaining how to do it I found most of them are not full. So thought to put an article my self.
The default authentication method of SharePoint is Windows. It will use a window to get the user information while logging in.
To change the authentication first you need to login to the Administrator site.
Now select Application Management and click on the link Authentication Providers under Application Security.

 In the Authentication Providers screen first make sure the correct web application is selected. If not, select the correct application using the drop down in the top left corner of the page.
  After selecting the correct application click on the Default zone (Please note that here I am going to change the default zones' authentication. If you are to change in another zone simply select the required zone).
 In the Edit Authentication page select Forms as the Authentication Type then in Membership Provider Name type AD, which we are to setup later. Then click the Save button.
 As of the result of changing the authentication providers the Web.Config file will be changed accordingly automatically. But this is not enough we need to enter the membership provider details ther in site Web.Config file and Administrator site Web.Config files.
 To do the necessary changes open both Web.Config files. Both files needed to be updated with the same information.
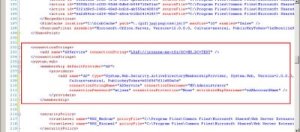
1. In the connection strings section add the following line.

This specifies the connection string to the AD. (Please note that my full computer name is 'ironone-ms-t01.MS.TEST' and my domain is 'MS.TEST'. You definitely need to change them according to your domain details.
2. Inside System.Web add a membership provider by entering the following text.

Application Web.Config
 SharePoint Administration Site Web.Config
Save both Web.Configs and do an IIS reset.
Go back again to the administration site and select Application Management. Now select Policy for Web application under Application Security.
After making sure that the correct web application is selected, click on Add Users.

Select the Default as the zone and click next.
When choosing users type the full user name preceding AD:. For example to add administrator type AD:Administrator. Under the permission section select the Full Control - Has full control check box and click Finish.
 As the final step you have to change the site collection administrators. For this click on Site Collection Administrators under SharePoint Site Management in Application Management.
  After verifying the selected application enter Primary Site Collection Administrator as AD:Administrator. If you want you can fill in Secondary Site Collection Administrator as well. After finishing click Ok.
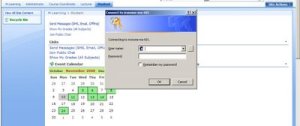
 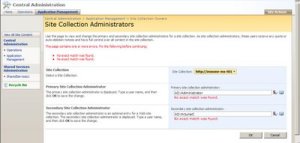 Now go back to the site and try to login, you will see that the traditional windows login page is replaced with a simple login web page. Since this login page is too simple I did some improvements to the login page and created my own one as you can see below.


No comments:
Post a Comment