Showing posts with label Windows. Show all posts

Sunday, April 12, 2015

Changing Registry Key Values using PowerShell

As you may be knowing, you can use Windows PowerShell to change registry values. In this article I am going to do five things.

I have created few registry entries to use in this example as seen below. In real world you can use whatever entries in your registry. It is always advisable to backup your registry before changing it.

clip_image002[13]

1. Set a registry key value.

To set a value you need to use the “Set-ItemProperty” cmdlet as below.

Set-ItemProperty -Path "HKLM:\Software\Test\Live" -Name "TestValue2" –Value “TestData2”

Above command will put “TestData2” in the registry key “TestValue2” located in HKEY_LOCAL_MACHINE\Software\Test\Live.


2. Read a registry key value.

Reading from the registry can be done by using the cmdlet “Get-ItemProperty”.

Below command will get the value in the “TestValue1” key.

Get-ItemProperty -Path "HKLM:\Software\Test\Live" -Name "TestValue1"


3. Using variables in PowerShell.

Here I am going to read a registry key value and put it to another registry key. This can be done using a variable. First you need to read the value into a variable using the “Get-ItemProperty” cmdlet and that value can be saved using the “Set-ItemProperty” cmdlet.


  1. # Check for the existance of the registry key.
  2. IF (Get-ItemProperty -Path "HKLM:\Software\Test\Live" -Name "TestValue1" -ea 0)
  3. {
  4.     # Fetching the value from TestValue1.
  5.     $OldValue = Get-ItemProperty -Path "HKLM:\Software\Test\Live" -Name "TestValue1"
  6. }
  7. ELSE
  8. {
  9. # Inserting a blank, if the registry key is not present.
  10.     $OldValue = ""
  11. }
  12. # Printing the value in the variable.
  13. Write-Host $OldValue.TestValue1
  14. # Setting the value to TestValue2.
  15. Set-ItemProperty -Path "HKLM:\Software\Test\Live" -Name "TestValue2" -Value $OldValue.TestValue1


4. Working with registry keys with spaces.

In case your registry keys contain spaces, you need to use double quotes in your script as seen below.


  1. # Check for the existance of the registry key.
  2. IF (Get-ItemProperty -Path "HKLM:\Software\Test\Live" -Name "Test Value 1" -ea 0)
  3. {
  4.     # Fetching the value from Test Value 1.
  5.     $OldValue = Get-ItemProperty -Path "HKLM:\Software\Test\Live" -Name "Test Value 1"
  6. }
  7. ELSE
  8. {
  9.     # Inserting a blank, if the registry key is not present.
  10.     $OldValue = ""
  11. }
  12. # Printing the value in the variable.
  13. Write-Host $OldValue."Test Value 1"
  14. # Setting the value to Test Value 2.
  15. Set-ItemProperty -Path "HKLM:\Software\Test\Live" -Name "Test Value 2" -Value $OldValue."Test Value 1"


5. Saving PowerShell commands as scripts and running them.

Both above can be saved as a PowerShell script by saving it in a file with the extension ps1. For example I did save it as “ChangeReg.ps1” in my C drive inside the folder “new”. Then the script can be run by browsing to the folder and using the command “.\ChangeReg.ps1”.

clip_image002[10]

After the script is run my registry keys looked like this.

clip_image002[3]

In case you need to retrieve values from other registry hives (locations), following table may be helpful.


Registry Hive

Abbreviation

1. HKEY_CLASSES_ROOT HKCR
2. HKEY_CURRENT-USER HKCU
3. HKEY_LOCAL_MACHINE HKLM
4. HKEY_USERS HKU
5. HKEY_CURRENT_CONFIG HKCC


In case you need to read more on “Get-ItemProperty” and “Set-ItemProperty”, use the links to visit official documentation from Microsoft TechNet.

Friday, November 01, 2013

Resetting Windows XP Mode

Recently I had a problem using Windows XP mode simply because the password for Windows XP mode was not working.This can happen when Windows XP mode password was changed in Windows XP Mode or when the Windows XP Mode was created from another user account to the one currently logged into the physical machine.

One way to fix this is by opening Windows XP Mode Windows Virtual PC Settings and deleting saved credentials. But in my case there were no saved credentials so my button was disabled.

clip_image002

Second way to fix this is by uninstalling Windows XP Mode and reinstalling it.

Third way is a quicker way to do this by simply cleaning the virtual machine files in folder “C:\Users\Administrator\AppData\Local\Microsoft\Windows Virtual PC\Virtual Machines”. Make sure you are only deleting the files relevant to Windows XP Mode.

clip_image002[5]

Then when you relaunch Windows XP mode, it will say that some of the required files are missing and will prompt to create a new environment. When you press “Create New” it will start the wizard to create a brand new Windows XP Mode.

clip_image001

If it generates any errors, you should try deleting the virtual machine file found in “<User Folder>\Virtual Machines”clip_image002[7]

After finishing the wizard you will get a new Windows XP Mode.

clip_image001[5]clip_image001[7]

clip_image001[21]clip_image001[19]clip_image002[9]clip_image002[14]

Thursday, January 31, 2013

Windows Shortcut Keys

If you are using Windows, following are some handy shortcut keys with their actions to make your life bit easy.

Key Combination

Action

Windows Key + E

Opens Windows Explorer

Windows Key + L

Locks Windows

Windows Key + F

Open Search

Windows Key + R

Open Run Window

Windows Key + D

Minimise / Restore All Applications

Windows Key + Space

Peek to Desktop

Windows Key + Home

Minimise all Applications except the current Application

Shift + F10

Right Click

Windows Key + Number Keys from 1 - 9

Activate / Show Application on Taskbar.

Windows Key + Right Arrow

Switch between different Application Layouts

Windows Key + Down Arrow

Minimize an Application

Windows Key + Up Arrow

Maximize Application

Windows Key + Shift + Up Arrow

Fit Application height to screen height

Windows Key + Shift + Right / Left Arrow

Move Applications among the connected Displays when having multiple displays.

In an Application Alt + F4

Closes the Application

At Desktop Alt + F4

Brings Shutdown Window


I did find these in Windows 7, but have not yet tested on other versions of Windows.


Friday, January 25, 2013

Lock Windows

If you wanted to lock your Windows using a batch file it can be achieved using the following command.

rundll32.exe user32.dll, LockWorkStation

This will be handy if you need to lock your computer after a certain scheduled action. Simply place this in a bat file, and schedule the bat file to be run to get the computer locked.

I tried this on Windows 7.

Monday, January 21, 2013

Enabling Hibernate in Windows 8

If you have start using Microsoft’s latest Personal Computer (PC) Operating System (OS) Windows 8, by now you may have found it is different in some ways to it’s predecessors. One feature I am heavily using in Windows was again missing after installing this version of Windows, which is the hibernation feature.

image

So if you like hibernation shown on your power menu try doing the following.

1. Move your mouse cursor to the right side of your screen to activate the quick access menu and click on Settings and then on Control Panel.

image

image

2. Then select “System and Security”.

image

3. Now select Power Options.

image

4. From the left hand navigation menu select “Choose what the power button does” or “Choose what closing the lid does”.

image

5. Now on system settings screen you need to click on “Change settings that are currently unavailable” to modify the disabled options.

image

6. Scroll down to Shutdown settings and check the box named Hibernate and click Save Changes button.

image

Now if you look at the options available in your power menu Hibernate will also be part of it.

image

If this does not bring hibernation back, please try the following as well.

1. From the power options screen select “Change plan settings” of the active plan.

image

2. Then select “Change advanced power settings”.

image

3. Now click on “Change settings that are currently unavailable”. This will list down all the features available in the system. Scroll down and expand Sleep –> Allow hybrid sleep and turn on hibernation as you want.

image

image


With these changes the “Hibernate” option should start appearing in your Power options menu.

Sunday, July 08, 2012

Enabling Windows Aero

Recently suddenly my computer lost Windows Aero effects. After trying out many things I found that it is due to the Log Me In mirror driver.

It seems Log Me In mirror driver is not compatible with Windows Aero effects so if you also lost Windows Aero and you have Log Me In installed on your machine to activate Aero back first try disabling “LogMeIn Mirror Driver” and restart your machine.

This can be done by going to Device Manager by clicking,

Start –> Control Panel –> Administrative Tools.

Then double click on Computer Management. Now in the Computer Management window click on the Device Manager.

Another way to reach the Device Manager is by pressing the Windows key and the Pause key in your keyboard simultaneously.

Now expand the Display Adapters and right click on LogMeIn Mirror Driver and click on Disable.

Device Manager

This will disable the Log Me In mirror driver enabling Windows Aero after you restart your machine.

If you cannot see Aero effects after the restart search for the word Aero in your start menu and click on the Aero troubleshooter and follow the wizard to get Aero effects back.

Aero

Saturday, June 05, 2010

Enabling Hibernate in Windows

Some server versions of Windows are having the hibernate feature disabled by default. So if you need to change the hibernation do the following simple steps.

1. Click start and type “cmd” or type command in the search box.

2. Then in the search results, right click the Command Prompt and click on Run as Administrator.

3. If you are prompted by the user account control click continue.

4. Then,

To turn hibernation on in your machine type -

powercfg.exe /h on” or “powercfg.exe /hibernate on

To turn hibernation off in your machine type -

powercfg.exe /h off” or “powercfg.exe /hibernate off

5. Lastly you can exit the command prompt by typing “exit”.


Sometimes you might get an error similar to the following while trying to enable hibernation.

Hibernation failed with the following error: The request is not supported.

The following items are preventing hibernation on this system.
        An internal system component has disabled hibernation.


This means your machine is running roles or services that are disabling hibernation feature. One such a role is Hyper-V. If your version of Windows 2008 is running Hyper-V then you cannot enable hibernation. This is not an error but is deliberately done since hibernating a server running virtual machines is a very complicated and rarely requiring service in an enterprise server.

But there is a way to enable hibernation on a Hyper-V installed machine, which you will be able to find in my next article.

Saturday, May 29, 2010

How to Make a Bootable Flash Drive

Recently I installed Windows using a flash (Pen/Thumb) drive, since I couldn’t get hold of a blank DVD to burn the ISO into.

It might be helpful to you as well. Because we don’t need to burn DVDs to install OSs that are coming as ISOs anymore.

Follow the steps below.

1. Find a good USB Flash drive with required space.

Make sure you have backed up all the required data in the flash drive because the flash drive will be formatted.

2. Get a command prompt by typing “cmd” in the run window.

3. Type “diskpart” and press enter.

This will open up a new window for DiskPart utility, you need to use the following commands within the diskpart utility to make the flash drive bootable.

4. In the diskpart utility select the flash drive by typing “select disk 2”.

Use extra caution when selecting the flash disk since if you select the wrong disk you will loose all data of that disk. You can use “list disk” command within the diskpart utility to list all the disks attached to your computer. Note the disk referred here is a physical disk attached to the computer not a partition.

5. Clean the disk by using the command “clean”.

6. Create a primary partition inside the flash drive by typing in “create partition primary”.

7. Select the newly created partition by using command "select partition 1”.

8. Make the selected partition active by typing in the command “active”.

9. Then you need to format the partition by using the command “format fs=fat32” inside the diskpart.

Note that we are formatting the disk using FAT32 file system.

10. Use the command “assign” to assign a drive letter for the newly formatted drive, since we are not giving a drive letter it will get the next available drive letter automatically. Then exit the diskpart utility by typing in “exit”.

11. Now we need to copy the setup files to the flash drive.

For this we can use the good old xcopy command as of below.

xcopy F:\*.* /s/e/f G:\

In the above command I am coping the contents of the drive F (which is a virtual drive created by Power ISO) to drive G which is the flash drive I created.

The meanings of the flags I used are as follows.

“xcopy F:\*.* /s/e/f G:\”

F:\ – Source Drive

*.* – All Contents

/s – Copies directories and sub directories which are not empty

/e – This will add the empty directories also so now all the directories and sub directories will be copied even though they are empty

/f  – Will show the source and destination file names while copying.

G:\ – Destination Drive

When xcopy completes you will have a flash drive which you can boot your computer, in my case I had a Windows 2008 R2 installer. You may even be able to copy the OS files to your flash drive and boot an OS with this method.

Then you may need to change your BIOS options and/or press function keys to let you boot from the flash drive.

Thursday, April 29, 2010

Windows XP Mode in Windows 7 – Knowing, Installing and Using

There is a cool feature provided by Microsoft for Windows 7 named Windows XP Mode. Simply this is an improved virtual machine which you can use to install applications that are not compatible with Windows 7.

Some advantages of this over Virtual PC are,

  • Use of virtually installed applications are faster and easy.
  • Virtual applications are performing faster.
  • Your Windows 7 start menu can be used to access all the applications that are installed on Windows XP Mode.
  • No need to start the virtual machine your self.
  • Application is run in normal Windows 7 not in another virtual environment.
  • Copy Paste is supported between applications without needing to install any other software addons.

To setup Windows XP Mode you need to download and install Windows XP Mode from Microsoft site. You can use the following link for that.

http://www.microsoft.com/windows/virtual-pc/download.aspx

There you need to download and install,

  1. Windows XP Mode (WXPM)
  2. Windows Virtual PC
  3. WXPM Update

Note - If you have installed Microsoft Virtual PC you need to uninstall that first, other wise WXPM will not work.

After you installed WXPM, it will be in your start menu.

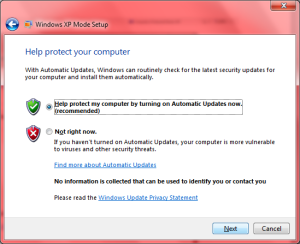
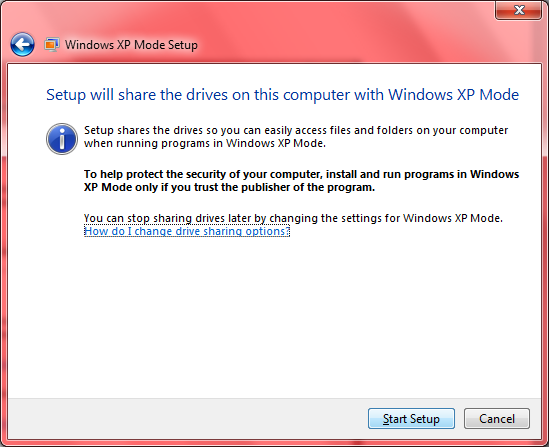
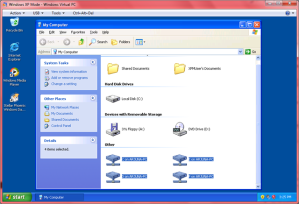
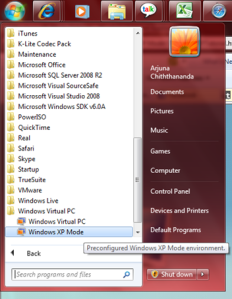
Setting up Windows XP Mode

1. Start WXPM by clicking on the start menu item.

2. Select an appropriate path for the installation of WXPM and give a suitable password, this password will be the password used for the Virtual PC (VPC) user. If you needed to manually connect to the VPC then you need this.

3. Use the next screen to enable the Windows Updates on the VPC.

4. Start the setup to initiate the configuration.

5. After the completion of the configuration WXPM will start a of shown below.

6. All your physical drives will be available on the WXPM as well so you will be able to select and install applications from either of them.

7. For the demonstration I installed “Stellar Phoenix Windows Data Recovery” software since it takes less time to setup.

8. After successfully installing the application on WXPM it will appear on your Windows 7 start menu so you will be able to invoke it directly from Windows 7.

9. As you see there is no difference to the way application is running or shown, and you will even not notice that the application is running in VPC.

Notes – Even though you don’t need, you can even connect to external networks or browse internet using the WXPM, if you do connect the VPC, remember to install a virus guard and enable the firewall for maintaining your computer safety.

Sunday, April 18, 2010

Windows Update Error

Today I faced an error when trying to install few updates for Windows. The message Windows was showing was “Windows update encountered an unknown error.”. So it was not helpful in resolving the issue.

This is happening due to either update not getting downloaded properly, getting corrupt while downloading, space issues in your hard disk, errors while applying updates, etc.

To my satisfaction one thing I did, fixed the issue. If you are also getting similar error I recommend you to first browse to your SoftwareDistribution folder inside Windows installation folder. For example I found it in “C:\Windows\SoftwareDistribution”.

Then delete all the folders in the folder (make sure the Windows Update is closed before doing this) and restart your computer.

After making sure your Windows installation partition is having enough free space (about 1 GB) try running Windows Update again. This time the updates will get installed successfully.

Wednesday, April 14, 2010

Error Installing Windows 7

Recently I tried installing Windows 7 64 bit version in to my HP Pavilion laptop, and I continuously got a problem while installing.

Installer was generating a blue screen with a message Page_Fault_in_NonPaged_Area referring to the file “wimfsf.sys” after coping files and showing the new Windows logo for about 10 seconds.

Since it is mentioning about a page fault and also I am trying with a 64 bit version of Windows I thought this is due to a problem related to hardware of my laptop, so I tried many alterations which included things like, flashing BIOS to various versions including new and old, plugging memory in different ways, installing other OSs to try setup Windows from within them, but nothing helped me to sort the issue except replacing the DVD.

Yes indeed, it was an issue with the installation media (DVD), if you also get a similar error when installing Windows 7, I suggest you to first try installing with a different media.

If you still get an error then try running Windows 7 Upgrade Advisor which can be downloaded from Microsoft. This will analyze your machine and will report you the compatibility details.

Also,

- updating your BIOS to the latest version,

- installing with only one memory module when you are having more,

- disabling special processor (virtualization) and memory (memory caching) functionalities,

- changing hard disk drive options,

will help you getting Windows installed successfully.

Monday, January 12, 2009

Windows 7

Next version of Microsoft Windows is here.
It is still in beta, but in Microsoft site you can preview it and even download a beta version.
Have a look at it.
http://www.microsoft.com/windows/windows-7

Sunday, September 14, 2008

Windows Server 2008

 
The next version of Windows Server is here. Windows Server 2008. Check what it offers for you. By visiting Microsoft.
You can even download a trial from Microsoft.

Monday, September 10, 2007

Accessing Windows XP Machines

Have you noted that when you try to access a Windows XP machine, in the Connect To window (Login screen) the User name field is disabled?
Earlier versions of Windows did not had this disabled so we were able to logon as any valid user by typing the account name and the password. But in Wondows XP this was disabled by a security policy.

This policy will also restrict the machine's ability of sharing files, per user sharing will not be possible.
Want to change it? Ok proceed by openning the Local Security Policy Settings window through Start -> Control Panel -> Administrative Tools -> Local Security Policy.
Now go to Network Access section and find out Net access : Sharing and security model for local accounts.
Then open the properties page of that by double clicking or right clicking and clicking on properties.

Did you note that the default is, Guest only - local users authenticate as Guest change this to Classic - local users authenticate as themselves.
Then press Ok to apply the setting and close all the opened windows.

Now from some other machine try to access your machine. See the difference. Now you can type any user name and the appropriate password and log in.

Also if you now go to folder properties you will see that the Sharing tab is having different content than earlier and also you will see a new tab named Security. You can use these tabs to set per user security and access rights.

For people who would like to know more, following is the explanation for the setting Net access : Sharing and security model for local accounts given by Microsoft.


Network access: Sharing and security model for local accounts
This security setting determines how network logons using local accounts are authenticated. If this setting is set to Classic, network logons that use local account credentials authenticate by using those credentials. If this setting is set to Guest only, network logons that use local accounts are automatically mapped to the Guest account.

The Classic model allows fine control over access to resources. By using the Classic model, you can grant different types of access to different users for the same resource. By using the Guest only model, you can have all users treated equally. All users authenticate as Guest, and they all receive the same level of access to a given resource, which can be either Read Only or Modify.

There are two models available:

  • Classic: Local users authenticate as themselves.
  • Guest only: Local users authenticate as Guest.

Default:Guest only on Windows XP Professional. Classic on the Windows Server 2003 family and Windows XP Professional computers joined to a domain.

Important:With the Guest only model, any user who can access your computer over the network (including anonymous Internet users) can access your shared resources. You must use the Internet Connection Firewall (ICF) or other similar device to protect your computer from unauthorized access. Similarly, with the Classic model, local accounts must be password protected; otherwise, those user accounts can be used by anyone to access shared system resources.
This setting only affects computers running Windows XP Professional which are not joined to a domain.This policy will have no impact on computers running Windows 2000.

Notes:This setting does not affect interactive logons that are performed remotely by using such services as Telnet or Terminal Services.When the computer is not joined to a domain, this setting also modifies the Sharing and Security tabs in the Windows Explorer to correspond to the sharing and security model that is being used.