Even though it is sometime after my wedding, I didn’t had a chance to blog about it, and suddenly thought to put a post with some pictures of that fabulous day of my life.
Wedding Day
Poruwa Ceremony

Our Wedding Cake


Parents and Us


Home Coming Day

Even though it is sometime after my wedding, I didn’t had a chance to blog about it, and suddenly thought to put a post with some pictures of that fabulous day of my life.
Wedding Day
Poruwa Ceremony
Our Wedding Cake
Parents and Us
Home Coming Day
Recently in an application we developed there was a requirement to stop the browser back button after user logs out of the application.
The reason behind this was to stop the security risk of another user without proper permissions peeking into the earlier users screens. If you notice in many applications if the browser back is not properly handled then after the user is logged out you can re visit the site by just pressing the browser back button. This happens because the browser shows the cached page when the back is pressed. Even if you have server side code to check for the user they will not fire since the page will load from cache.
With the limited time I found a genius idea to handle this in the internet. What this javascript does is it will always try to put the user back to the last page in the history. For example, I am having a login page and a default page which I am taking a user after he logs in. You need to place the following javascript in the default page to make the above happen.
Then once a user logs out from the system and if presses the back button of the browser, when the default page loads it will put the user again to login (history forward) page which is the login page. Ultimately user needs to login again to go back to the site.
After disconnecting the battery for a maintenance job, I had some clueless days while trying to reset the clock in a car audio system. Even though there should be a way to set the clock in audio systems it is bit difficult to find it without the manual of the system.
My in my scenario I found it after sometime, so thought to share it since it might help someone with the same problem.
Car audio system in which I had the issue was JVC KD-S5055.
 To start the resetting you need to press and hold the “Select” button for about 5 seconds. Then a message similar to “Hour-h” will be shown in the display. Once this appears use the + and – buttons located on the left to set the hour value of the time.
Then to set the minute value you need to press the mode change buttons located on the right side. Once you press the mode change button while on the hour changing mode you will see a message similar to “Minute-m”. Then again you can use the + and – buttons to set the minutes portion of the time.
After successfully setting both hour portion and minute portion you can press the Select button again to save the changes made to he clock.
Additionally if you need the system to show the time when the device is switched on you can press the Display button located below the Select button. This will show the current time instead of the Radio/CD/Track information.
Hope this helps.
Today a friend of mine needed some help from me on sending the same letter to different people while addressing the letters differently. This can be easily achieved by using Word Mail Merge feature.
Since I am having Word 2010 installed in my machine this post will list the steps required in Word 2010.
1. To start the process type in your letter and click on Mailings on the Word 2010 ribbon.

2. Click on Start Mail Merge and select Letters.

3. Then you need to select the people you need to send the letter to. To do that you have three options Type List, Use Existing List or Select from Outlook contacts. In this post I will use the first option.

4. When you click Type new List… you will get a window in which you can create a list of users with their details as shown in the following screenshot. For simplicity I will only create 2 users.

When you are done creating the list of users click ok so you will be prompted with a save window. Save it for later use since you may need the list for future use.
5. Then in your letter go to the appropriate places you need to place the differencing information, for example I need to put the address of the receiver after the text The Manager. To do so place the cursor on the required location and press on Address Block icon on the ribbon.

From the Insert Address Block window you can customize the way the address is printed on the letter. For example if you do not want to print the company name of the recipient then you can remove the checkmark on the Insert company name field. Preview pane will show you a preview of the actual data you have in your contact list. For the simplicity I will use the default options.

When you press ok you will see something similar to the following appearing in your letter, which will be the placeholder for the address block.

Following similar method but using the Insert Merge Field icon I did add the title and the last name of the recipient into the body section of the letter as you see below.

6. Preview your work by clicking Preview Results icon, by clicking the navigation buttons on the preview results pane you can navigate through your contacts to see the actual letters that will be created. For example below screenshot shows the letter for Mr. Withana with the changes for him.

7. When you are satisfied you can finish the merge with three options, in my case I will use the first option again.

As the final output of the merge I got one new document with the 2 letters addressed to the recipients i had in my contact list as shown in the following screenshot.

If you have not configured Azure Development Storage to use your SQL Server, then while running your application targeted for Azure you will see an error similar to the following.
“Windows Azure Tools: Failed to initialize Development Storage service. Unable to start Development Storage. Failed to start Development Storage: the SQL Server instance ‘localhost\SQLExpress’ could not be found. Please configure the SQL Server instance for Development Storage using the ‘DSInit’ utility in the Windows Azure SDK.”
To overcome this you need to run the DSInit command using Windows Azure SDK Command Prompt.
Step 1 – Start the Windows Azure SDK Command Prompt.
 Step 2 – Type DSInit /sqlinstance:. on the prompt and press enter.

The dot (.) at the end denotes the local SQL Server instance running on your machine. DSInit command details are as follows.
| Syntax: DSInit [/sqlinstance:<SQL server instance>] [/forceCreate] [/user:<Windows account name>] |
| Description: Initialize the development store for usage by Reserving http ports for the blob, table and queue services for the current user, and Creating the database needed by the blob and queue services |
| Options: sqlinstance : the name of the SQL Server instance on the local machine that should be used for Development Storage. The default is SQLExpress. Use "." for unnamed instance. forceCreate : recreate the database even if it already exists. user : user for whom ports are to be reserved. By default it is the current user. |
.
After doing the configurations it will display a success screen similar to the following.

Then when you run your Azure ready application the Azure Development Storage and Azure Development Fabric will get started and notify you on your system tray as shown below.


After a while your application will also start without complaining if it is Azure ready.
Have you noticed that with the default settings of SQL Server 2008 R2 you cannot use the design view to edit and save table changes which requires table to be recreated. But if you used earlier SQL Server installations you should remember that this functionality was possible. When you try to save such a table you will see an error similar to the following in SQL Server 2008 R2.
 But the good news is that we can enable this functionality by going to SQL Server options.
Click Tools –> Options and expand Designers node and select ‘Table and Database Designers’.
Then uncheck the option ‘Prevent saving changes that require table re-creation’ and press OK.
 Now if you try to save the table changes SQL will do the alteration without any complains.
Recently I needed to sort the contents of a SharePoint folder, in which I used IComparer to get my task done. Following is the code I used. Hope it is helpful.
As you see below I am using the TimeCreated property of SPFile object to do the comparison, other than this you can use any other property of the SPFile object. For a list of available properties refer MSDN.
Are you interested in musical instruments? If so have you seen an instrument which combines the Piano and the Guitar? It is manufactured by a company named Marcodi and is named as Harpejji. The sounds from it is truly fascinating, experience the sounds for you self by visiting their site. For people who would like to buy it the pricing and ordering details are also there in the site.

Click this link to see the event of presenting Harpejji first time to the great musician A. R. Rahman.
If you are involved in coding using .Net sooner or later you will notice that when the TextMode of a TextBox is changed to MultiLine the MaxLength property will stop working. What this means is in the textbox users will be able to type as many character as they want.
When searching the web for a fix for this I found several ideas to solve this. Following is the code which I modified for my requirement. Hope this helps.
ASPX
ASPX.CS
The output will me something similar to the following.

When we are regularly using databases, sometimes those will get corrupted. This happened to one of my applications, it was a Windows Mobile application with SQL Server CE database. Since it is running in a mobile it is bit difficult for us to fix the database using the desktop machine. I used the following .Net Compact framework code to fix the corrupted database while the database is in the mobile.
Do you guys also get the ”Cannot connect to YouTube” error on your iPhone when using the provided YouTube application?
 If yes follow the steps below to get it fixed.
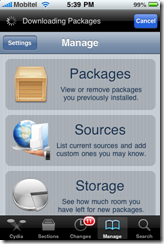
1. Open Cydia from your spring board.

2. Press on the Manage tab in the bottom.

3. Press on Sources, then on Edit and press again on Add to add a new source.


4. Type the URL http://apt.iphonemodding.com and press on Add Source button. 
5. Now find the iPhoneModding item and press on the triangle ‘>’.

6. Scroll down and find the “Push Fix” item and press on it.
7. Press Install to get Push Fix installed on your iPhone.

8. After pressing confirm on the confirmation screen the application will get installed on your iPhone.


9. After a complete restart you will be able to use YouTube application within your iPhone.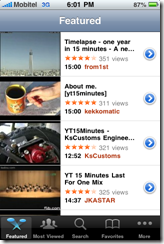
It is some time since the SharePoint 2010 is released and now is a good time for you to migrate to the new improved version of it. When searching the net I found some good sites which compares the 2 versions.
Read through the following sites if you are interested.

