Friday, June 11, 2010

Selecting a Row in ASPxGridView

I found that with the flood of new possibilities with DevExpress grid view a simple functionality of selecting one row is bit hidden. After doing bit of searching in the internet I found the way and thought to share it.

The way we need to do this is by using a java script and bind that in to the RowClick event of the grid.

The java script will look like the following.

<script type="text/javascript">
        function OnRowClick(e) {
            //Unselect all rows
            dxgdSearch._selectAllRowsOnPage(false);
            //Select the row
            dxgdSearch.SelectRow(e.visibleIndex, true);
        }
</script>

Then the binding to the RowClick would be as below.

<ClientSideEvents RowClick="function(s, e) { OnRowClick(e); }"></ClientSideEvents>

The outcome of this is a grid which you can select a row.

The value of the selected row can be taken as below.

dxgdSearch.GetRowValues(dxgdSearch.FocusedRowIndex, "Customer_ID")

For example in my application I used to pass the Customer Id to the Customer.aspx form as below.


  1. Response.Redirect("~/Customer.aspx?cusID= " + dxgdSearch.GetRowValues(dxgdSearch.FocusedRowIndex, "Customer_ID"));


The full source is as of below.

Page.aspx


  1. <asp:Content ID="Content4" ContentPlaceHolderID="MainContent" runat="server">
  2.     <script type="text/javascript">
  3.         function OnRowClick(e) {
  4.             //Unselect all rows
  5.             dxgdSearch._selectAllRowsOnPage(false);
  6.             //Select the row
  7.             dxgdSearch.SelectRow(e.visibleIndex, true);
  8.         }
  9.     </script>
  10.     <dx:ASPxGridView ID="dxgdSearch" ClientInstanceName="dxgdSearch" runat="server" AutoGenerateColumns="False"
  11.         SettingsBehavior-AllowFocusedRow="True" SettingsBehavior-AllowMultiSelection="False">
  12.         <ClientSideEvents RowClick="function(s, e) { OnRowClick(e); }"></ClientSideEvents>
  13.         <Columns>
  14.             <dx:GridViewDataTextColumn Name="Id" ShowInCustomizationForm="True" VisibleIndex="1"
  15.                 Caption="Customer ID" FieldName="Customer_ID" Visible="False">
  16.             </dx:GridViewDataTextColumn>
  17.             <dx:GridViewDataTextColumn Name="Name" ShowInCustomizationForm="True" VisibleIndex="0"
  18.                 Caption="Name" FieldName="Full_Name">
  19.             </dx:GridViewDataTextColumn>
  20.             <dx:GridViewDataTextColumn Name="TelephoneNo" ShowInCustomizationForm="True" VisibleIndex="1"
  21.                 Caption="Tele. No." FieldName="Mobile_Number">
  22.             </dx:GridViewDataTextColumn>
  23.             <dx:GridViewDataTextColumn Name="EMail" ShowInCustomizationForm="True" VisibleIndex="2"
  24.                 Caption="EMail" FieldName="Email">
  25.             </dx:GridViewDataTextColumn>
  26.             <dx:GridViewDataHyperLinkColumn Name="Select" VisibleIndex="3">
  27.                 <DataItemTemplate>
  28.                     <asp:Button ID="Button1" runat="server" CommandArgument='<%# Eval("Customer_ID") %>'
  29.                         OnClick="Button1_Click" Text="Edit" />
  30.                 </DataItemTemplate>
  31.             </dx:GridViewDataHyperLinkColumn>
  32.         </Columns>
  33.         <SettingsBehavior AllowFocusedRow="True"></SettingsBehavior>
  34.         <Settings ShowGroupPanel="True" ShowFilterRow="True" />
  35.         <Settings ShowFilterRow="True" ShowGroupPanel="True"></Settings>
  36.     </dx:ASPxGridView>
  37. </asp:Content>


Page.aspx.cs


  1. protected void Button1_Click(object sender, EventArgs e)
  2. {
  3.     Response.Redirect("~/Customer.aspx?cusID= " + dxgdSearch.GetRowValues(dxgdSearch.FocusedRowIndex, "Customer_ID"));
  4. }


iPhone 4

If you are a iPhone lover then your next dream is in stores.

Apple had released iPhone 4 with many improvements.

Go and have look into it at Apple.

Thursday, June 10, 2010

Unable to start debugging on the web server

Recently a set of developers who are working in one of my projects started getting an error while trying to debug the web application under development using ASP.Net. The targeted framework was .Net 4.0 and they were using Visual Studio 2010 in 64bit machines. The problem was whenever they tried to run/debug the application they gets an error saying unable to start debugging on the web server even though there are no compile errors as shown below.

image

It gave an error HTTP Error 500.21 - Internal Server Error Handler "PageHandlerFactory-Integrated" has a bad module "ManagedPipelineHandler" in its module list when ran direct from IIS. The error page is shown below.

image_thumb[1]

Later I found the reason for this is ASP.Net 4 was not properly installed on the machine. To fix this get an administrative privileged command prompt.

image

Then type in the following,

aspnet_regiis -ir

You can find the aspnet_regiis.exe at the folder,

[Windows Dir]\Microsoft.NET\Framework64\v4.0.xxxxx

for example,

C:\Windows\Microsoft.NET\Framework64\v4.0.30319

This will register ASP.Net 4.0 in your machine, the -ir option will keep the existing applications unchanged. If you want them to be changed to use the new version use -i instead -ir.

When the installer ends type iisreset to restart the IIS service.

image

Now your applications will work fine without any complains.

Saturday, June 05, 2010

Enable Hibernation and Sleep in Windows Server 2008 R2

Normally when you install Hyper-V role in your server, it will disable sleep and hibernate facilities provided by Windows.

But you can avoid this by doing some alterations to Windows.

Hibernate and seep features are disabled when the Hyper-V service is started, so you can regain hibernate and sleep by changing the start parameter of the Hyper-V service (hvboot).

To change,

1. Open the registry editor by typing “regedit” in the run window.

Locate the key,

HKEY_LOCAL_MACHINE\SYSTEM\CurrentControlSet\Services\hvboot and then set the start value of it to 3.

Start property can hold the following values.

0

Boot (Not supported by hvboot.)

1

System

2

Auto

3

On Demand

4

Disabled

Now you will have the hibernate and sleep facilities until you start the Hyper-V services in your machine.
2. Type the following command in a command prompt window with administrative rights.
sc config hvboot start= demand
Note that there needs to be a space between the = sign and the word demand.

Enabling Hibernate in Windows

Some server versions of Windows are having the hibernate feature disabled by default. So if you need to change the hibernation do the following simple steps.

1. Click start and type “cmd” or type command in the search box.

2. Then in the search results, right click the Command Prompt and click on Run as Administrator.

3. If you are prompted by the user account control click continue.

4. Then,

To turn hibernation on in your machine type -

powercfg.exe /h on” or “powercfg.exe /hibernate on

To turn hibernation off in your machine type -

powercfg.exe /h off” or “powercfg.exe /hibernate off

5. Lastly you can exit the command prompt by typing “exit”.


Sometimes you might get an error similar to the following while trying to enable hibernation.

Hibernation failed with the following error: The request is not supported.

The following items are preventing hibernation on this system.
        An internal system component has disabled hibernation.


This means your machine is running roles or services that are disabling hibernation feature. One such a role is Hyper-V. If your version of Windows 2008 is running Hyper-V then you cannot enable hibernation. This is not an error but is deliberately done since hibernating a server running virtual machines is a very complicated and rarely requiring service in an enterprise server.

But there is a way to enable hibernation on a Hyper-V installed machine, which you will be able to find in my next article.

Monday, May 31, 2010

Changing the Shared Feature Directory in SQL Server Setup

Today when I tried to install SQL Server 2008 R2 I couldn’t change the shared feature installation directory in the setup. Both the textbox and browse button were disabled restricting me to select the desired path.

After sometime I found the cause for this. It is because there were some SQL related programs already installed in my computer, because they are there the SQL setup uses the same directory to setup the rest of the programs.

If you need to relocate the install directory then simply you need to uninstall all the SQL related programs using Programs and Features and re-run the SQL Server setup. Then the browse buttons will be active enabling you to select an alternate location.

Saturday, May 29, 2010

How to Make a Bootable Flash Drive

Recently I installed Windows using a flash (Pen/Thumb) drive, since I couldn’t get hold of a blank DVD to burn the ISO into.

It might be helpful to you as well. Because we don’t need to burn DVDs to install OSs that are coming as ISOs anymore.

Follow the steps below.

1. Find a good USB Flash drive with required space.

Make sure you have backed up all the required data in the flash drive because the flash drive will be formatted.

2. Get a command prompt by typing “cmd” in the run window.

3. Type “diskpart” and press enter.

This will open up a new window for DiskPart utility, you need to use the following commands within the diskpart utility to make the flash drive bootable.

4. In the diskpart utility select the flash drive by typing “select disk 2”.

Use extra caution when selecting the flash disk since if you select the wrong disk you will loose all data of that disk. You can use “list disk” command within the diskpart utility to list all the disks attached to your computer. Note the disk referred here is a physical disk attached to the computer not a partition.

5. Clean the disk by using the command “clean”.

6. Create a primary partition inside the flash drive by typing in “create partition primary”.

7. Select the newly created partition by using command "select partition 1”.

8. Make the selected partition active by typing in the command “active”.

9. Then you need to format the partition by using the command “format fs=fat32” inside the diskpart.

Note that we are formatting the disk using FAT32 file system.

10. Use the command “assign” to assign a drive letter for the newly formatted drive, since we are not giving a drive letter it will get the next available drive letter automatically. Then exit the diskpart utility by typing in “exit”.

11. Now we need to copy the setup files to the flash drive.

For this we can use the good old xcopy command as of below.

xcopy F:\*.* /s/e/f G:\

In the above command I am coping the contents of the drive F (which is a virtual drive created by Power ISO) to drive G which is the flash drive I created.

The meanings of the flags I used are as follows.

“xcopy F:\*.* /s/e/f G:\”

F:\ – Source Drive

*.* – All Contents

/s – Copies directories and sub directories which are not empty

/e – This will add the empty directories also so now all the directories and sub directories will be copied even though they are empty

/f  – Will show the source and destination file names while copying.

G:\ – Destination Drive

When xcopy completes you will have a flash drive which you can boot your computer, in my case I had a Windows 2008 R2 installer. You may even be able to copy the OS files to your flash drive and boot an OS with this method.

Then you may need to change your BIOS options and/or press function keys to let you boot from the flash drive.

Wednesday, May 19, 2010

Connecting to MySQL in Visual Studio 2010

If you need to access MySQL databases using Visual Studio you have to install MySQL connector into your machine.

Currently only mysql-connector-net-6.3.1 is supporting Visual Studio 2010 which is still an alpha product.

To download it, use this link and switch to Development Releases tab.

Saturday, May 15, 2010

Preserving State in ASP.Net

As you know a main challenge in web development is preserving the state of the application. We say web is stateless because web server treats each HTTP request for a page as an independent request. The server will not know any knowledge of variable values that were set/used during the previous requests. For example in Windows applications after we start the application if we set a variable to a certain value in a form it will be there until we close the form. But in web since the page is getting posted back the value will be normally lost.

To overcome this limitation in web ASP.Net provides two main methods and they are having different options under them.

  1. Client Side State Management
    1. View State
    2. Cookies
    3. Query String
  2. Server Side State Management
    1. Session State
    2. Application State
    3. Profile Properties

1.1- View State

Viewstate is a technique used in ASP.Net to preserve the state changes during the page postbacks. The viewstate data is always belong to the page, so this needs to be used when we want to store data at page level and retrieve them on the same page. Viewstate data will not be available from another page.

Viewstate uses a hidden form field named __VIEWSTATE as default to store the state information. When the “EnableViewstate” property of a control is set to true ASP.Net will start saving the control state in the viewstate. If we enable this property for many controls then soon the viewstate hidden variable will be large, and that may slow our application since this needs to be transferred at each postback. For example each time we submit a page the viewstate will go from our machine to server and from server to our machine. Due to this reason we should consider whether it is really required before enabling viewstate for a control. One advantage viewstate has is that it is not using server resources.

Apart from the viewstates of the controls in the form we can also add the values we need to preserve to the viewstate.

Adding a value -


  1. ViewState["Text"] = value;


  1. ViewState.Add("Text", value);


Retrieving a value -


  1. object o = ViewState["Text"];


  1. string str = (string) ViewState["Text"];


Read more at http://msdn.microsoft.com/en-us/library/bb386448.aspx.

1.2- Cookies

We use cookies to store frequently changed small amount of data at client side. We can control the life span of a cookie. For example we can create a cookie which expires when the session is over or which exists indefinitely in the client machine.

Cookies are light weight since they are text based structures having key value pairs. They are not taking any server resources since they are at client, but this also adds a disadvantage on security because users/hackers can tamper them. To prevent this we can encrypt cookies but this will reduce application performance. There is also a limit to the amount of data which we can be stored in a cookie. Also if cookies are blocked in browser the application will fail.

Adding a value -


  1. Response.Cookies["userData"]["Name"] = "Arjuna";
  2. Response.Cookies["userData"]["lastVisit"] = DateTime.Now.ToString();
  3. Response.Cookies["userData"].Expires = DateTime.Now.AddDays(1);


  1. HttpCookie aCookie = new HttpCookie("userData");
  2. aCookie.Values["Name"] = "Arjuna";
  3. aCookie.Values["lastVisit"] = DateTime.Now.ToString();
  4. aCookie.Expires = DateTime.Now.AddDays(1);
  5. Response.Cookies.Add(aCookie);


Retrieving a value -


  1. HttpCookie cookie = Request.Cookies["userData"];
  2. if (cookie == null)
  3. {
  4.     lblCookieText.Text = "Cookie not found.";
  5. }
  6. else
  7. {
  8.     lblCookieText.Text = cookie.Values[0] + ", " + cookie.Values["lastVisit"];
  9. }


Read more at http://msdn.microsoft.com/en-us/library/ms178194.aspx.

1.3- Query String

A query string is the information added at the end of the URL. This is supported by all the browsers and does not consume server resources. But this has limited capacity and security problems.

Adding a value -


  1. Response.Redirect("Webform2.aspx?Name=" +
  2. this.txtName.Text + "&LastName=" +
  3. this.txtLastName.Text);


Retrieving a value -

Using Webform2.


  1. this.TextBox1.Text = Request.QueryString[0];
  2. this.TextBox2.Text = Request.QueryString["LastName"];


2.1- Session State

Session state (variables) needs to be used to store session specific data. For example the logged in user information can be stored in session. Session variables are accessible by the entire set of pages in an application within the same session.

Session is created once a user visits a site and the session will end when the user leaves a site or when user becomes idle. Session variables are stored in a SessionStateItemCollection object that is exposed through the HttpContext.Session property. In an ASP.NET page, the current session variables are exposed through the Session property of the Page object. One disadvantage is that the session variables are taking server resources.

Adding a value -


  1. Session["Name"] = “My Name”;


Retrieving a value -


  1. string str = (string) Session["Name"];


Read more at http://msdn.microsoft.com/en-us/library/ms178581.aspx.


2.2- Application State

Application state (variables) are used to store application specific data. Application state will be accessible to any users connected to the application. Normally global data which are infrequently changed, having no security concerns are stored in an application state.

The HttpApplicatioState instance is created at the first time a user accesses any URL resource in an application and the application state is lost when the application is ended. For example if the web server is restarted. If the value is required after application restart then before application end the required values needs to be transfered to a non volatile medium such as a database for later retrieval. The HttpApplicationState class is most often accessed through the Application property of the HttpContext class. When using the application state we need to remove any unnecessary items as soon as it is not required to maintain the site performance.

Adding a value -

When adding a value to an application variable it is always good to lock it before adding data since application state data can be accessed by multiple threads at the same time. Otherwise invalid data or erroneous data will appear. The loack needs to be removed after adding or changing the value to make the application state available for other threads.


  1. Application.Lock ();
  2. Application["NumberofViews"] = 1;
  3. Application.UnLock ();


Retrieving a value -


  1. string str = (string)Application["NumberofViews"];


Read more at http://msdn.microsoft.com/en-us/library/ms178594.aspx.

2.3 Profile Properties

Profile properties uses an ASP.Net profile and is user specific. This is similar to session state except that the data stored in profile properties are not lost when session is ended.

We can store the profile data in a place that we like. If we are using SQL Server to store them then we can use SqlProfileProvider, if not we can write our own profile provider classes so the profile data will be stored in custom formats and in a custom storage mechanisms, such as an XML file, or even to a Web service. But performance will be less since the data is stored in a data store. Also to use it additional configurations and to keep it in a fully optimized level maintenance activities are required.

Adding a value -

First we need to add the required provider and the properties to the web.config file.


  1. <profile enabled="true">
  2.   <providers>
  3.     <clear/>
  4.     <add name="AspNetSqlProfileProvider" type="System.Web.Profile.SqlProfileProvider" connectionStringName="ApplicationServices" applicationName="/"/>
  5.   </providers>
  6.   <properties>
  7.     <add name="UserName" />
  8.   </properties>
  9. </profile>


Retrieving a value -


  1. TextBox1.Text = System.Web.Profile.DefaultProfile.Properties["UserName"].DefaultValue.ToString();


Read more at http://msdn.microsoft.com/en-us/library/2y3fs9xs.aspx.

Read more on ASP.Net state managements at http://msdn.microsoft.com/en-us/library/75x4ha6s.aspx.

Thursday, May 06, 2010

"Login failed. The login is from an untrusted domain and cannot be used with Windows authentication."

If you are getting the above error while trying to connect to a database, the reason is you are using Windows Authentication to login to the SQL Server while being in another untrusted domain.

For example if the SQL Server machine is a member of the CompanyDomain and if you are in MyDomain or if you are in a Workgroup the you will face the above issue while trying to connect to the SQL Server.

The connection string used in the web.config while the above error is generated is as follows.


  1. <connectionStrings>
  2.   <add name="cnnStr" connectionString="Data Source=BI-SVR;Initial Catalog=BBIDatabase;Integrated Security=True"/>
  3. </connectionStrings>


There are three ways to fix this problem.

1. Use the SQL Authentication to login to the SQL Server.

You can get this done by changing the connection string to use SQL authentication while connecting. But you need to know the credentials of an account which is having permissions to your required database or the System Administrator (SA) password. For simplicity I will use SA account details in the connection string.


  1. <connectionStrings>
  2.   <add name="cnnStr" providerName="System.Data.OleDb" connectionString="Data Source=BI-SVR;Persist Security Info=True;Password=YourPassword;User ID=sa;Initial Catalog=BBIDatabase"/>
  3. </connectionStrings>


2. Login to your machine using the same Domain.

If you login to your machine using a domain account which the SQL Server is added to, then this error will vanish. But for this you need to add your machine to the same domain which the SQL Server machine is added to (CompanyDomain) also to properly get authenticated the account used should have proper permissions set to access the database in the SQL Server.

3. Make the account trusted in SQL Server.

By making the account you use to login to your machine trusted account in SQL Server and giving it appropriate permissions to access databases will also permit you to fix this error.

Thursday, April 29, 2010

Windows XP Mode in Windows 7 – Knowing, Installing and Using

There is a cool feature provided by Microsoft for Windows 7 named Windows XP Mode. Simply this is an improved virtual machine which you can use to install applications that are not compatible with Windows 7.

Some advantages of this over Virtual PC are,

  • Use of virtually installed applications are faster and easy.
  • Virtual applications are performing faster.
  • Your Windows 7 start menu can be used to access all the applications that are installed on Windows XP Mode.
  • No need to start the virtual machine your self.
  • Application is run in normal Windows 7 not in another virtual environment.
  • Copy Paste is supported between applications without needing to install any other software addons.

To setup Windows XP Mode you need to download and install Windows XP Mode from Microsoft site. You can use the following link for that.

http://www.microsoft.com/windows/virtual-pc/download.aspx

There you need to download and install,

  1. Windows XP Mode (WXPM)
  2. Windows Virtual PC
  3. WXPM Update

Note - If you have installed Microsoft Virtual PC you need to uninstall that first, other wise WXPM will not work.

After you installed WXPM, it will be in your start menu.

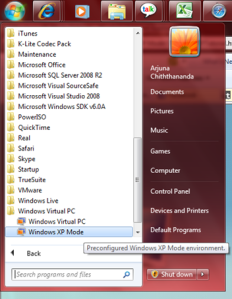
Setting up Windows XP Mode

1. Start WXPM by clicking on the start menu item.

2. Select an appropriate path for the installation of WXPM and give a suitable password, this password will be the password used for the Virtual PC (VPC) user. If you needed to manually connect to the VPC then you need this.

3. Use the next screen to enable the Windows Updates on the VPC.

4. Start the setup to initiate the configuration.

5. After the completion of the configuration WXPM will start a of shown below.

6. All your physical drives will be available on the WXPM as well so you will be able to select and install applications from either of them.

7. For the demonstration I installed “Stellar Phoenix Windows Data Recovery” software since it takes less time to setup.

8. After successfully installing the application on WXPM it will appear on your Windows 7 start menu so you will be able to invoke it directly from Windows 7.

9. As you see there is no difference to the way application is running or shown, and you will even not notice that the application is running in VPC.

Notes – Even though you don’t need, you can even connect to external networks or browse internet using the WXPM, if you do connect the VPC, remember to install a virus guard and enable the firewall for maintaining your computer safety.

Sunday, April 18, 2010

Windows Update Error

Today I faced an error when trying to install few updates for Windows. The message Windows was showing was “Windows update encountered an unknown error.”. So it was not helpful in resolving the issue.

This is happening due to either update not getting downloaded properly, getting corrupt while downloading, space issues in your hard disk, errors while applying updates, etc.

To my satisfaction one thing I did, fixed the issue. If you are also getting similar error I recommend you to first browse to your SoftwareDistribution folder inside Windows installation folder. For example I found it in “C:\Windows\SoftwareDistribution”.

Then delete all the folders in the folder (make sure the Windows Update is closed before doing this) and restart your computer.

After making sure your Windows installation partition is having enough free space (about 1 GB) try running Windows Update again. This time the updates will get installed successfully.

Wednesday, April 14, 2010

Error Installing Windows 7

Recently I tried installing Windows 7 64 bit version in to my HP Pavilion laptop, and I continuously got a problem while installing.

Installer was generating a blue screen with a message Page_Fault_in_NonPaged_Area referring to the file “wimfsf.sys” after coping files and showing the new Windows logo for about 10 seconds.

Since it is mentioning about a page fault and also I am trying with a 64 bit version of Windows I thought this is due to a problem related to hardware of my laptop, so I tried many alterations which included things like, flashing BIOS to various versions including new and old, plugging memory in different ways, installing other OSs to try setup Windows from within them, but nothing helped me to sort the issue except replacing the DVD.

Yes indeed, it was an issue with the installation media (DVD), if you also get a similar error when installing Windows 7, I suggest you to first try installing with a different media.

If you still get an error then try running Windows 7 Upgrade Advisor which can be downloaded from Microsoft. This will analyze your machine and will report you the compatibility details.

Also,

- updating your BIOS to the latest version,

- installing with only one memory module when you are having more,

- disabling special processor (virtualization) and memory (memory caching) functionalities,

- changing hard disk drive options,

will help you getting Windows installed successfully.

Monday, April 12, 2010

SQL Server Reporting Services Error - The report server cannot open a connection to the report server database. A connection to the database is required for all requests and processing. (rsReportServerDatabaseUnavailable)

Recently in one of my virtual servers I got the above error when trying to open the SQL Server Reporting Services (SSRS).

If this is happening to you I recommend checking the following things in your server.


1. Remote Connections in SQL Server.

Go to Start –> All Programs –> Microsoft SQL Server 200x –> Configuration Tools and open SQL Server Configuration Manager.

Now check whether the TCP/IP and Named Pipes are enabled in the 3 Protocol sections.

If they are disabled then enable them then check whether the remote connections are enabled using the SQL Server Management Studio by right clicking on the SQL Server (Parent node in the Object Explorer) and selecting properties.

Then go to the Connections and make sure that the Allow remote connections to this server checkbox is checked.

Then restart the SQL Server Service using the SQL Server Services section in the SQL Server Configuration Manager or by going to the machine services by Start –> Administrative Tools –> Services.


2. Check the SSRS Service Account.

Go to Start –> All Programs –> Microsoft SQL Server 200x –> Configuration Tools and open Reporting Services Configuration Manager. Then click on the Service Account section and verify its details. If you are not sure about the details it’s always good to re-enter them since there is nothing to loose.

3. Check the SSRS Database and Credentials.

Click the Database section and see whether all details are correct. This is very important since SSRS need to get connected to its SQL database to function properly. Pay good attention to validate the SQL Server Name, verify the database mentioned under Database Name exists in the specified SQL Server. If you are not sure of the existing settings just click on the Change Database button and it will open a wizard to step through.

If you already have reports in the SSRS then always try to Choose an existing report server database before Creating a new report server database since when you create a new database you will loose existing customizations you might have.

Then go to the bottom section to see the Credentials provided are correct. I am used to validate these by opening the management studio and trying to connect using the provided account. After validating the account using the management studio, to be in the safe side you can set those settings using the Change Credentials button.


4. Check your Firewall.

If the you have enabled a firewall such as Windows Firewall or a 3rd party firewall it might be blocking the functionalities required. Just try switching off the firewall, if that solves then try creating a rule for the firewall to authorize the required connections.


Hope this helps to correct the error, if not let me know some times I may be able to help.

Sunday, April 11, 2010

.Net Nullable Types

A variable of a nullable type can be used to store the normal range of values allowed by the underlying data type plus the Null. Nullable types are instances of System.Nullable.

Since reference types already supports Null, nullable types represent value type variables which supports null.

For example Nullable<bool> (or spoken like nullable of bool) can be used to store true, false and null.

There are two ways to declare a nullable variable.

Method 1


int? i; // Declaring
i = null; // Initializing

int? i = 4; // Declariong and initializing


Method 2


Nullable<int> a; // Declaring
a = 4; // Initializing

Nullable<int> a = null; // Declariong and initializing


As you see above assigning values to a nullable is same as for a normal variable. But when retrieving the value you need to be little careful.

Method 1 – Using GetValueOrDefault

GetValueOrDefault property is available for nullable variables. If the variable is null it will get the default value for the type otherwise the actual value it contains.


textBox1.Text += "Value of i - " + i.GetValueOrDefault();


Method 2 – Using variable.Value

When you are going to retrieve the value inside the variable using .Value be careful to first check whether there is actually a value in the variable, otherwise .Net will generate an InvalidOperationException with a description of “Nullable object must have a value”.


// \r\n is used to insert a new line.
if (i == null)
    textBox1.Text += "\r\n" + "i is Null";
else
    textBox1.Text += "\r\n" + "i is - " + i.Value;


or


// Environment.NewLine is equal to placing a new line or \r\n.
if (a.HasValue)
    textBox1.Text += Environment.NewLine + "a has - " + a.Value;
else
    textBox1.Text += Environment.NewLine + "a has Null";


The full code would look like the following.


  1. // Declaring Method 1
  2. int? i; // Declaring
  3. i = null; // Initializing
  4. //int? i = 4; // Declariong and initializing
  5. // Get value using GetValueOrDefault().
  6. textBox1.Text += "Value of i - " + i.GetValueOrDefault();
  7. // \r\n is used to insert a new line.
  8. if (i == null)
  9.     textBox1.Text += "\r\n" + "i is Null";
  10. else
  11.     textBox1.Text += "\r\n" + "i is - " + i.Value;
  12. // Declaring Method 2
  13. //Nullable<int> a; // Declaring
  14. //a = 4; // Initializing
  15. Nullable<int> a = 4; // Declariong and initializing
  16. // Environment.NewLine is equal to placing a new line or \r\n.
  17. if (a.HasValue)
  18.     textBox1.Text += Environment.NewLine + "a has - " + a.Value;
  19. else
  20.     textBox1.Text += Environment.NewLine + "a has Null";


The output would be,

Value of i - 0
i is Null
a has – 4

You could use the ?? operator to assign the default value for a non nullable variable while the nullable contains null as the current value.


int? Null_X = null;
int NonNull_y = Null_X ?? -1;


Friday, April 09, 2010

Features of Search Engines

How many of you know that common and popular search engines like Google and Bing are providing many other functionalities than searching?

Yes it is true there are many functionalities within them that most of us don’t know.

Following are some features, you can try these out by typing the italic text in your favorite search engine.

  1. Finding the date and the time of a place. – “Time Sri Lanka”, “time Melbourne
  2. Checking spelling of words. – “Cheking”, ”mathmatics”
  3. Finding results of arithmetic. – “(25*34)+78”, “2**5”
  4. Finding the weather if a place. – “Weather Colombo”, “weather Changi”
  5. Finding the populations of countries or popular cities. – “Population UK”, “population Sri Lanka”
  6. Converting units. – “12.5km in Meters”, “3km in inches”
  7. Stock details. – “MSFT”, “AAPL”
  8. Find similar word (Synonyms). – “~Cooking”, “~hot drinks”
  9. Finding currency values. – “1 GBP in AUD”, “89.34 AUD in USD”
  10. Finding maps. – “New York Map”, “Sydney map”
  11. Finding definitions of words. – “Define Computer”, “define language”
  12. Other than above you can find about Books, Movies, Air Line Schedules etc. But they are widely for other countries like UK, US.

While searching you can use special characters like wild cards, concatenate, subtract to help while searching. Try them out to find the results by your own.

Sunday, April 04, 2010

How to Read and Write Text

Reading and writing to text files had been made easy by .Net.

Following code will create a text file and insert 2 lines to it and will then read it and display.


  1. // System.IO is required for file handling.
  2. using System.IO;


  1. // Creating a stream writer object.
  2. // @ is used before the string to avoid the string getting broken by the /.
  3. StreamWriter stWriter = new StreamWriter(@"C:\Backup\File.txt");
  4. // Writing into the file.
  5. stWriter.Write("It is now ");
  6. stWriter.WriteLine(DateTime.Now);
  7. stWriter.WriteLine("The End");
  8. // Closing the file.
  9. stWriter.Close();
  10. // Reading the file.
  11. // Checking the availability of the file.
  12. if (File.Exists(@"C:\Backup\File.txt"))
  13. {
  14.     // Without using the @, \\ also can be used to represent \ inside of a string.
  15.     using (StreamReader stReader = File.OpenText("C:\\Backup\\File.txt"))
  16.     {
  17.         // Temporary variable.
  18.         string str = "";
  19.         while ((str = stReader.ReadLine()) != null)
  20.         {
  21.             // Assigning to a label.
  22.             label1.Text += str + "\n";
  23.         }
  24.     }
  25. }
  26. else
  27.     MessageBox.Show("Error, File cannot be found.");


Friday, March 26, 2010

SharePoint Page Types

Do you know in SharePoint there are two types of pages?

In a SharePoint site each page you see is either a ghosted page or an unghosted page.

Ghosted (Uncustomized) Pages

These are the pages stored in the severs file system but not in the database. The other important thing is these files are common to all the site collections within the SharePoint server and are generally based on the "out of the box" site definition templates. Basically they are working as template files. Ghosted pages are faster since ASP.NET parser will be used to parse them and as you might know ASP.NET parser will compile the page into an assembly on the first time it is rendered, on subsequent executions the compilation is skipped since the assembly is already there.

When ghosted pages are modified by SharePoint designer then they will become unghosted pages, and then SharePoint will start using that file in the future not the file stored in the file system. A common example for this would be the “default.master” file on the “C:\Program Files\Common Files\Microsoft Shared\web server extensions\12\TEMPLATE\Global“.

Unghosted (Customized) Pages

These are the pages which are stored on the database. Unghosted pages are specific to the SharePoint web site the page is in. If you change these files it will not affect any other site in the same SharePoint server. Unghosted pages will be parsed by the safemode parser which will not compile the pages. The only dynamic code allowed is server-side controls that are marked safe (Safe Controls, Trusted Controls).

Why Ghosting?

This allows SharePoint to,

  • Increase it’s performance by enabling caching the main site template into memory and then apply the changes that are stored in the database for the specific file.
  • Increases security by not allowing unghosted pages to run code so an attacker who injects code will not be able to crash your server.

Tuesday, March 23, 2010

Finding the IP Address of the Email Sender

Recently I was bit curios to find out whether we can find the IP address of the sender in an email. After doing some web searching I found interesting sites which describes what needs to be done.

If you like to find out the way to do this please visit and see.

http://www.johnru.com/active-whois/trace-email.html

http://aruljohn.com/info/howtofindipaddress/

Saturday, March 13, 2010

Protect HTML Files

Recently I came up with a requirement to protect a website which was created using HTML.

When searching over the internet a team member of mine found a nice software called HTML Guard.

This software is encoding the source of the site so the users will not be able to see the code behind the site. Using this tool you can even block a site to a particular domain. Even the site is downloaded it will not properly run.

The best thing is this has a free version so we can use the full set of features without paying (A small message will come on the top right corner saying the site is encoded by using the tool).

This software is by WulfSoft, thanks guys you have done a good job.

Try out yourself and see.

http://www.htmlguard.com/

Reading and Writing to Excel Files

Even though I posted similar 2 articles in 2008, the code of that article was having few errors. So thought to put more complete post on this.

The code will read an Excel file using an OleDbConnection and will write the same data back to another Excel file. This will explain how to read and write to Excel files. One thing to remember when running this code is to make sure the source Excel file is open. Otherwise you will get an error similar to “External table is not in the expected format.”

Also note that there are few connection string parameters you can use while opening Excel files.

HDR = Yes – Use when first row contains column headers.

HDR = No  - Use when first row contains data.

Excel xx.x – Use the following Table as a guide.

Parameter Value

Excel Version

Excel 12.0 Excel 2007 (Released in 2007)
Excel 11.0 Excel 2003 (Released in 2003)
Excel 10.0 Excel XP (Released in 2001)
Excel 9.0 Excel 2000 (Released in 1999)
Excel 8.0 Excel 97 (Released in 1997)


IMEX=1 – Use this when you want to treat all your data in the file as text.

For example - >

Extended Properties="Excel 12.0 Xml;HDR=YES;IMEX=1";

To make the code to work properly you need to refer the Microsoft.Office.Interop.Excel assembly by adding a reference to your project.


  1. using System;
  2. using System.Data;
  3. using System.Windows.Forms;
  4. using System.Data.OleDb;
  5. using Microsoft.Office.Interop.Excel;
  6. namespace TestApp
  7. {
  8.     public partial class Form1 : Form
  9.     {
  10.         public Form1()
  11.         {
  12.             InitializeComponent();
  13.         }
  14.         private void button1_Click(object sender, EventArgs e)
  15.         {
  16.             openFileDialog1.ShowDialog();
  17.             // Create an OLEDBConnection to connect to the Excel file.
  18.             // I'm getting the required file by using a file dialog.
  19.             // The @ symbol makes the string to contain any special characters inside the string without breaking the string.
  20.             OleDbConnection dbConnection = new OleDbConnection(@"Provider=Microsoft.Jet.OLEDB.4.0;Data Source=" + openFileDialog1.FileName.ToString() + @";Extended Properties=""Excel 8.0;HDR=Yes;""");
  21.             // Open the connection.
  22.             dbConnection.Open();
  23.             // Create a command object to work on the data.
  24.             // Note that I have given the sheet name as [Sheet1$] to retrieve data from that named sheet in the particular Excel file.
  25.             OleDbCommand dbCommand = new OleDbCommand("SELECT * FROM [Sheet1$]", dbConnection);
  26.             // Creating a data reader to read data.
  27.             OleDbDataReader dbReader = dbCommand.ExecuteReader();
  28.             // If needed you can get the position of any column (e.g. Age), this will only work if you use HDR=Yes.
  29.             int SearchingItem = dbReader.GetOrdinal("Age");
  30.             // Create the Excel Application object.
  31.             ApplicationClass ExcelApp = new ApplicationClass();
  32.             // Set the visibility of the application.
  33.             ExcelApp.Visible = true;
  34.             // Create a new Excel Workbook.
  35.             Workbook ExcelWorkbook = ExcelApp.Workbooks.Add(Type.Missing);
  36.             // Create a new Excel Sheet.
  37.             Worksheet ExcelSheet = (Worksheet)ExcelWorkbook.Sheets.Add(ExcelWorkbook.Sheets.get_Item(1), Type.Missing, 1, XlSheetType.xlWorksheet);
  38.             // Will keep the current row index. This should start from 1 since the first row is 1.
  39.             int CurrentRowIndex = 1;
  40.             try
  41.             {
  42.                 // Read through the data.
  43.                 while (dbReader.Read())
  44.                 {
  45.                     // Traverse through all the data columns.
  46.                     for (int i = 0; i < dbReader.VisibleFieldCount; i++)
  47.                     {
  48.                         ExcelSheet.Cells[CurrentRowIndex, i + 1] = dbReader.GetValue(i);
  49.                     }
  50.                     CurrentRowIndex++;
  51.                 }
  52.                 // Save the Excel sheet.
  53.                 // The @ symbol makes the string to contain any special characters inside the string without breaking the string.
  54.                 ExcelApp.Save(@"C:\Projects\Ex.xls");
  55.             }
  56.             catch (Exception ex)
  57.             {
  58.                 MessageBox.Show(ex.ToString());
  59.             }
  60.         }
  61.     }
  62. }


Friday, March 05, 2010

Project has Stopped Working

If you create a .NET application to use SQL CE database when you try to run your application on a Windows Vista or Windows 7 machine you might get an error saying your application did stop working, and the error details might show that your are having a problem with System.Data.SQLServerCE.

The reason for this is that your system is not having the SQL Server CE runtime in your machine. To fix it what you need to do is to install the Microsoft SQL Server Compact 3.5 Service Pack 1 on your system. You can download it from the following Microsoft link.

http://www.microsoft.com/downloads/details.aspx?FamilyId=DC614AEE-7E1C-4881-9C32-3A6CE53384D9&displaylang=en

Wednesday, February 17, 2010

An error shown when you try to start the SharePoint Search service

After installing the SharePoint Server when you try to start the search service you might end up with the following error.

An unhandled exception occurred in the user interface.Exception Information: OSearch (Administrator)

or

An unhandled exception occurred in the user interface.Exception Information: OSearch (UserName)

If this comes don’t panic, what you need to do is when providing the username provide it with the full domain name. For example Domain.Local\Administrator.

image

You can find the Microsoft knowledge base article here.

Windows Mobile 7

Highly awaited Windows Mobile 7 is at last showing in horizon.

Have a glance at it by visiting the following URL.

http://www.microsoft.com/presspass/presskits/windowsphone/videoGallery.aspx?contentID=mobileworldcongress2010

http://www.microsoft.com/windowsmobile/en-us/cmpn/windowsphone7series/default.mspx

http://www.windowsphone7series.com/

Microsoft is planning to release phones with Windows Mobile 7 at the end of 2010.

Sunday, February 14, 2010

How Networks Work

I found a really good video which explains how data is travelled in the network. This explains in simple words with animation about the tasks done by the following main components and more.

  • Packet
  • Router
  • Switch
  • Firewall

If anyone is interested in networking I highly recommend you to watch this.

Thursday, February 04, 2010

Making Reliable Connections in BlackBerry Applications

Recently I came up across a blog which provides valuable information on the connections we can make in a BlackBerry application.

If you are interested read more at the following URL.

http://www.localytics.com/blog/post/how-to-reliably-establish-a-network-connection-on-any-blackberry-device/