Saturday, November 05, 2011

Word Field Code Samples

As I mentioned in my last post, I will list down some uses of Word field codes here. If you would like to know what they are I invite you to read my previous post on field codes.

Notes -

  • Always remember to user Ctrl + F9 to put curly braces, sorry no copy pasting, you have to type all.
  • If the codes are misbehaving, right click and click on Update Field.
1. Using Word how to greet the user according to the time of the day.
 

{ If "{ Time \@ "HH:mm" }" > "12:00" { If "{ Time \@ "HH:mm" }" > "15:00" { If "{ Time \@ "HH:mm" }" > "18:00" "Good Night" "Good Evening" } "Good Afternoon" } "Good Morning" }

image

image

2. Concatenating text and displaying in Word.

Welcome { UserName } you are reading { FileName \* MergeFormat }.

image

3. Displaying page number in odd pages and text on others in Word.

{ If { =Mod({ Page }, 2) } =1 { Page } "PTO" }

image

image

4. Using Word skipping page number on first two pages and then showing page numbers starting from number 2.

{ If { Page } < 3 "" { ={ Page } - 1 } }

image

image

5. Displaying last saved user name on the last page in Word.

{ If { Page } = { NumPages } "This { FileName } was last saved by { LastSavedBy } on {DocProperty LastSavedTime }. Document was edited for { EditTime } minutes." "" }

image

6. Displaying number of characters, words, paragraphs, pages in a Word document.

This document has { NumWords } words in { NumPages } pages.

image

This document has { NumChars } characters in { DocProperty Paragraphs } paragraphs.

image

Thursday, November 03, 2011

Field Codes in Word

When playing with Microsoft Word I found a nice feature from which we can do few more things with Word other than typing documents.

It is known as field codes. Below are some of them with their descriptions.

Field Code

Description

DocProperty Retrieves current document properties.
NumChars Retrieves the number of characters in the current document.
NumWords Retrieves the number of words in the current document.
NumPages Retrieves the number of pages in the current document.
Page Retrieves the current page number of the document.
LastSavedBy Retrieves the name of the user who saved the document last.
SectionPages Retrieves the total number of pages in the current section.
Template Retrieve the name of the title the document is based on.
Time Retrieves the current system time and you can format the time using date formats.
UserInitials Retrieves the current user’s initials.
UserName Retrieves the current user’s name.


I did mention only few field codes above to just make you start thinking the things which can be achieved by using them in your documents.

To demonstrate I will create a Word document which greets the user with his name. To do this there are 2 ways, one is easy and the other is little hard.

Method 1

1. First the easy way, just open Word, place your cursor where you need your greeting to appear and click on Insert tab to show the insert ribbon. Then click on Quick Parts and then on Field

image

2. From the field window select UserName field and choose an appropriate format from the format list and press ok.

image

This will add the following to your Word document which is responsible in showing the current user’s name.

{ USERNAME  \* Caps \* MERGEFORMAT }

3. To hide the code and display the user name right click on the code and click on Toggle Field Codes.

image

Since I did put the word Welcome in front of this the code the output appears as below.

image

If you need to change the code you can right click on the user name displayed and click on Edit Field.

Method 2

Bit difficult way of doing the same is to just type in the code without the help of Word. Since we know what to type in, the trick is to press Control key and F9 (Ctrl + F9) keys before doing anything.

To get this done just go to the place where you need the user name to appear and then press Ctrl + F9 keys. This will add two curly braces (“{  }”) onto Word (Always press Ctrl + F9, never type the braces manually since then it will not work). Then just type in the code we used earlier and it will work the same way.

Knowing the below keyboard shortcuts will ease your life.

Ctrl + F9 – Will add code insertion points to Word.

Shift + F9 – Will toggle the currently selected field code.

Alt + F9 – Will toggle all the filed codes found in the Word document.

If you find that the codes are not working as they should be, simply try right clicking on it and clicking on Update Field.

Hope this is helpful to you and later I will be putting another post with some field codes in action.

Monday, October 31, 2011

JavaScript Performance Testing

Recently I found a site which enable us to compare the performance of different JavaScripts that we write. This makes us choose the best code when we have several ways of doing the same thing because we can compare the performance of the script that we wrote easily.

If you are interested, go to http://jsperf.com/ to start testing.

You need to just put in “Presentation code HTML” and the required JavaScripts as test cases. Then after saving you can run the tests to check for performance.

Another feature of this site is that you can share your tests with others since you can access the tests using the shown public URL.

imageimage

Saturday, September 17, 2011

TechEd Australia – Videos

As you might know TechEd Australia ended few weeks back. I am sure lot of you might not have the chance to visit it. The good thing is you can watch the recorded sessions online now by visiting the following site.

http://channel9.msdn.com/events/teched/australia/tech-ed-australia-2011

I think this will be mostly useful to people who didn’t visit TechEd and also to people who visited it to refresh their minds.

Monday, August 29, 2011

Installing a Telephone Connector

In the current place I am living I didn’t have a telephone connection, when I applied for a connection and got the connection I found that some of the line wiring and connectors are out of shape. So I had to replace some items and rewire. When doing it I faced few issues since the connector was a legacy connector. So I thought to put an article on how to correctly get it done.

The connector I found in my place is the old Australian connector which is sometimes named as legacy Australian connector or 610 socket. Following are some images to correctly identify it.

imageimageimage


To get it correctly fitted first you need to identify your correct wire pairs, luckily in mine only one pair was working (meaning only one line was present). So I just used my multi meter to find the correct wire pair. Since phone wires will have DC current remember to put your multi meter into DC mode before measuring. Also note that phone lines may conduct 24v-50v DC current normally. When ringing this will change to 75v-90v AC.

IMPORTANT - If you touch them directly you might get an electric shock even though it is not deadly so always make sure you are wearing gloves or adequate footwear since if you do not like to get shocked.

Even though the old phone cables only had 4 wires the new ones are having more. Sometimes this can even be 50. When there are more wires it means that the wire can be used to connect more lines. For example a cable with 4 wires can be used for 2 lines. A cable with 16 wires can transmit 8 phone lines. To identify the pairs correctly phone wires inside a cable are color coded. Since I am not an expert in this area I will only talk about 6 wired cables. The following will be helpful to find the correct wire pairs for you.

  • Pair 1 ring (Blue) 6
  • Pair 1 tip (White) 2
  • Pair 2 ring (Black) 1
  • Pair 2 tip (Red) 5
  • Pair 3 ring (Green) 3
  • Pair 3 tip (Orange) 4

Now you may be wondering few things, wait I will try to explain.

In the above cable since it has 6 wires it can accommodate 3 phone lines or pairs. For example first pair is White and Blue wires, second pair is Black and Red wires and third pair is Green and Orange wires.

The words ring and tip are like live and neutral or + and –. Ring is battery negative and tip is ground. Since some answering machines do need these correctly hooked in it is always good to connect them correctly to get the ultimate from your equipment.

The last digit in Black represent the place the wire should be connected in the phone socket. To explain this more I will use the following picture I took on 610 socket after removing its cover.

image

If you closely look into the socket you will see there are numbers from 1 to 6 (sorry they are not visible in the image) marking the pins. The numbering starts from right to left in the image. So the Red wire in the image is connected to pin 1 and Blue wire is connected to pin 6.

After identifying the pins in the socket and wire pairs the next step is to correctly connect them. You just need to connect the pairs as per the last digit shown in the bulleted list above. If you correctly got it it should end up like this.

From right to left on the socket.

  • Pair 2 ring (Black) – Pin 1
  • Pair 1 tip (White) – Pin 2
  • Pair 3 ring (Green) – Pin 3
  • Pair 3 tip (Orange) – Pin 4
  • Pair 2 tip (Red) – Pin 5
  • Pair 1 ring (Blue) – Pin 6

Then replace the socket cover and plug in the compatible plug (605) into the socket.

image

As you see in my plug only four contacts are there meaning I only can use 2 phone lines (pairs), but since I only have one line this is not an issue to me. So make sure to find the correct plug if you are trying to utilize all 3 pairs.

I know there must be many unanswered questions. Even though I am not an expert on this area let me know if you face any problems, I will try to help you.

Thursday, July 28, 2011

Comparing Content Management Systems

Recently I needed to compare the features of different Content Management Systems (CMS) and came up to the following site which has a huge list of Systems with the ability to compare their features.
http://www.cmsmatrix.org/

Thursday, July 07, 2011

Came Back to Australia

Since last May I was back in Australia with my wife, so didn’t had a chance to update my site for a long time. This time I will be staying in Adelaide for long.

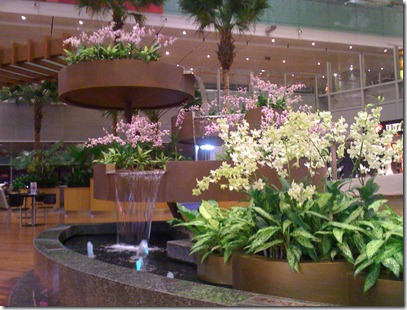
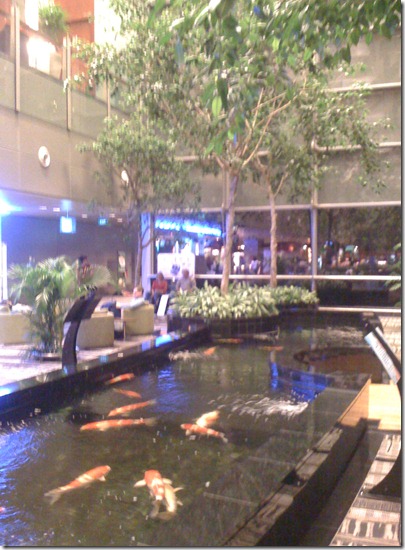
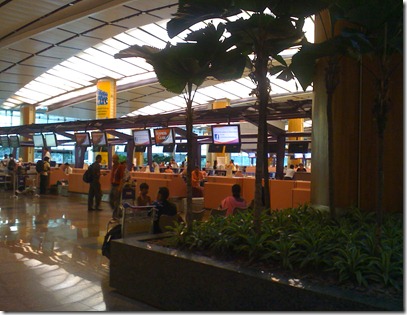
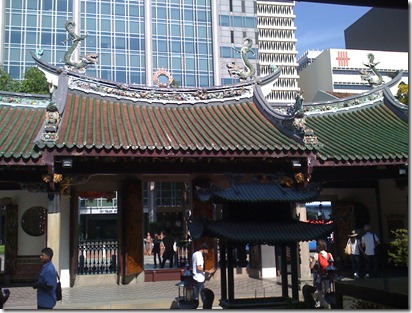
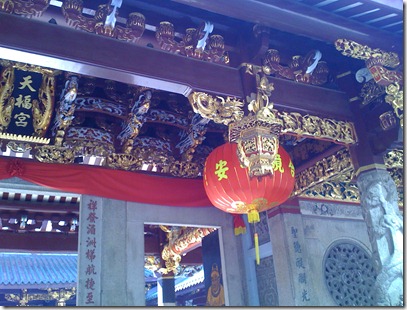
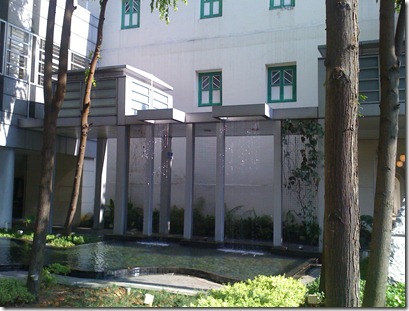
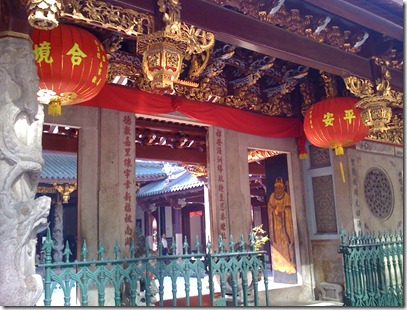
Thought to share some pictures I took on my way here through Singapore.

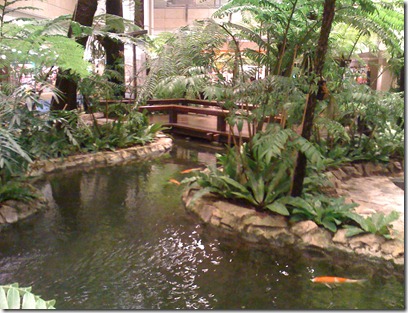
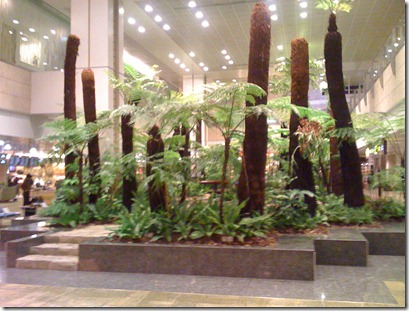
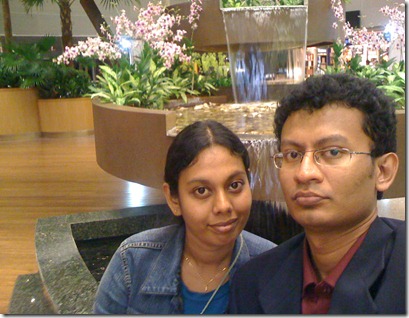
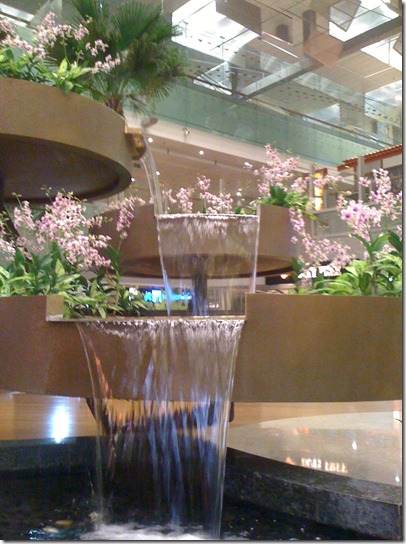
Following are some photos I took while we were in some indoor gardens at Singapore Airport.

IMG_2819IMG_2826IMG_2894IMG_2896IMG_2897IMG_2900IMG_2901IMG_2904IMG_2887

Some photos I captured while we were in Singapore City.

IMG_2841IMG_2852IMG_2853IMG_2856IMG_2866IMG_2867IMG_2868IMG_2871IMG_2872IMG_2875IMG_2876IMG_2882IMG_2884

Even though this was my second time in Singapore I will never be bored being in Singapore due to vast variety of facilities Changi airport is providing.

In flight to Adelaide, Australia on Singapore Airlines Airbus A330.

IMG_2918

Tuesday, April 26, 2011

Database Not Accessible

Recently after restoring a database backup which I got from another server I repeatedly encountered an error when logged in using a user who is given permission. But when ‘sa’ account is used I could work with the database without any problem.

The error message was “The database DATABASE NAME is not accessible. (ObjectExplorer)” which was not helpful since it didn’t give any clue to figure out the issue.

image

Later I found that the issue is because the user in the restored database is not properly mapped to the user in the new server and the resolution for this is to run the stored procedure sp_change_users_login to correct the orphaned user.

  • sp_change_users_login 'update_one', 'USER', 'LOGIN' – Links the given user in the current database to the specified login.
  • sp_change_users_login 'auto_fix', 'USER' – Links the given user in the current database to the login having the same name in the current server.

After running this you will be able to access the restored database without any issue using the mentioned database user.

Sunday, April 03, 2011

SharePoint 2010 Videos

Thought to share few sites I found which might help you start development on SharePoint 2010.

Official Microsoft SharePoint Site

Getting started developing on SharePoint

SharePoint Resources for Developers – This has links to many SharePoint learning videos

Using SharePoint 2010

Hope these helps.

Menu Overlapping with Report

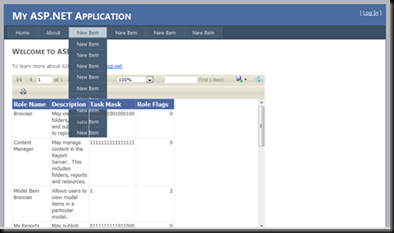
If you had lengthier menus in you ASP.Net application and had used report viewer control you may have faced the problem of report and menu overlapping when ever the report is loaded with data. For example in my sample application it appeared as below.

image

To correct this behavior you need to set the z-index for menu and report viewer using CSS class property. For this I have used the following CSS classes in the Style.CSS.

  1. /* CSS Class for the Menu. */
  2. div.menu
  3. {
  4.     padding: 4px 0px 4px 8px;
  5. }
  6.  
  7. /* CSS Class for a Menu Item. */
  8. div.menu ul
  9. {
  10.     list-style: none;
  11.     margin: 0px;
  12.     padding: 0px;
  13.     width: auto;
  14.     z-index: 1; /* Setting the control to appear on top of level 0 controls for e.g. report viewer. */
  15. }
  16.  
  17. /* CSS Class for the Report Viewer. */
  18. .report
  19. {
  20.     z-index: 0; /* Setting the control to appear below the level 1 controls for e.g. menu items. */
  21. }

To apply the CSS use a code similar to following.

Appling CSS Class to menu in master page.

  1. <asp:Menu ID="NavigationMenu" runat="server" CssClass="menu"
  2. EnableViewState="false" IncludeStyleBlock="false" Orientation="Horizontal">
  3.     <Items>
  4.         <asp:MenuItem NavigateUrl="~/Default.aspx" Text="Home"/>
  5.         <asp:MenuItem NavigateUrl="~/About.aspx" Text="About"/>
  6.         <asp:MenuItem Text="New Item" Value="New Item">
  7.             <asp:MenuItem Text="New Item" Value="New Item"></asp:MenuItem>
  8.             <asp:MenuItem Text="New Item" Value="New Item"></asp:MenuItem>
  9.             <asp:MenuItem Text="New Item" Value="New Item"></asp:MenuItem>
  10.             <asp:MenuItem Text="New Item" Value="New Item"></asp:MenuItem>
  11.             <asp:MenuItem Text="New Item" Value="New Item"></asp:MenuItem>
  12.             <asp:MenuItem Text="New Item" Value="New Item"></asp:MenuItem>
  13.             <asp:MenuItem Text="New Item" Value="New Item"></asp:MenuItem>
  14.             <asp:MenuItem Text="New Item" Value="New Item"></asp:MenuItem>
  15.             <asp:MenuItem Text="New Item" Value="New Item"></asp:MenuItem>
  16.         </asp:MenuItem>
  17.         <asp:MenuItem Text="New Item" Value="New Item">
  18.             <asp:MenuItem Text="New Item" Value="New Item"></asp:MenuItem>
  19.             <asp:MenuItem Text="New Item" Value="New Item"></asp:MenuItem>
  20.             <asp:MenuItem Text="New Item" Value="New Item"></asp:MenuItem>
  21.         </asp:MenuItem>
  22.         <asp:MenuItem Text="New Item" Value="New Item"></asp:MenuItem>
  23.         <asp:MenuItem Text="New Item" Value="New Item"></asp:MenuItem>
  24.     </Items>
  25. </asp:Menu>

Appling CSS Class to report viewer.

  1. <rsweb:ReportViewer ID="ReportViewer1" runat="server" Font-Names="Verdana" CssClass="report"
  2.     Font-Size="8pt" InteractiveDeviceInfos="(Collection)" WaitMessageFont-Names="Verdana"
  3.     WaitMessageFont-Size="14pt" Width="636px">
  4.     <LocalReport ReportPath="Report1.rdlc">
  5.         <DataSources>
  6.             <rsweb:ReportDataSource DataSourceId="ObjectDataSource1" Name="DataSet1" />
  7.         </DataSources>
  8.     </LocalReport>
  9. </rsweb:ReportViewer>


This will correct the overlapping issue as seen below.

image

Sunday, February 27, 2011

Amazing Craft Shop Benthota – Sri Lanka

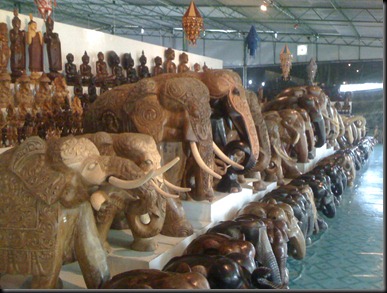
Recently when I visit my home town Benthota I happen to step into a craft shop on the way to my home thinking to buy a wooden model of an elephant. Before stepping into the shop it was appeared to me as a shop having a huge collection of animal models but I felt I am wrong after entering into the shop.

The collection was larger than I imagined, it had almost all the craft items you can possibly buy in Sri Lanka. To name some it had many different god statues, animal models, traditional masks, resting chairs, wall hangers, leather items, hand bags, shoes, African masks, etc… Since the list may go on for some time I thought to put some pictures I took of the place to give you an idea.

IMG_2343

If you are a tourist visiting Sri Lanka or if you are a Sri Lankan searching for handi/crafts I recommend you to visit this shop. You can find this shop besides the road when you are travelling from Benthota to Yathramulla.

If you need any help finding the place or buying these stuff let me know, I might be able to help you.

Monday, February 21, 2011

Saman Villas Benthota – Sri Lanka

If you are in Sri Lanka there are many places that you should visit, among them one very good and different hotel that I recommend is Saman Vilas Benthota.

Even though a friend told me that it is an amazing hotel I didn’t think that it would be such a great place until I went there. Because of its shear beauty I thought to put a post on that amazing hotel.

It is different because it will not provide you rooms but it will provide private villas for your comfort. Some of them are even having private swimming pools as well. Among the many other goodies you will get there, one thing is that you can wake up into the rising sun from your villa with a great view of the ocean. Also the food is very tasty and the presentation is also very attractive. Another specialty of the hotel is that the kitchen staff is working all 24 hours for you. If you need to have a late dinner at about 1:00 AM they are very happy to cater you without any extra payments and you only needs to ask the friendly staff.

If you would like to relax your body the best place is to go to their spa, you will be entitled to a 15 minutes free massage. If interested you can also use their library as well.

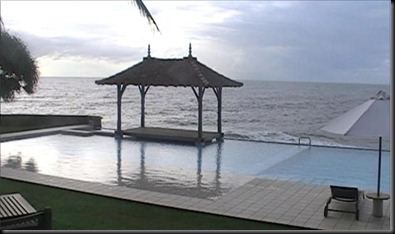
Before putting pictures I should say that it is having very nice views which are worth experiencing. No need to explain more since the following pictures that I took will prove my fact.

12

Contact them to get more details.

Hotel

Aturuwella, Benthota. Sri Lanka
Tel: +94 34 2275435, +94 34 4936200.
Fax: +94 34 2275433, +94 34 4287063.
resv@samanvilla.com

Head Office

90 Gothami Road, Colombo 08. Sri Lanka
Tel: +94 11 4866515, +94 11 2679562.
Fax: +94 11 4611049.
resv_samanvil@sltnet.lk

http://www.samanvilla.com/